Small Mezzotints
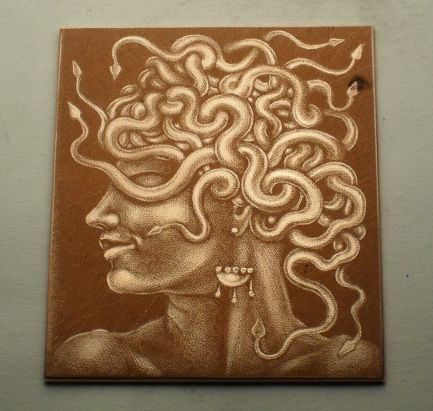
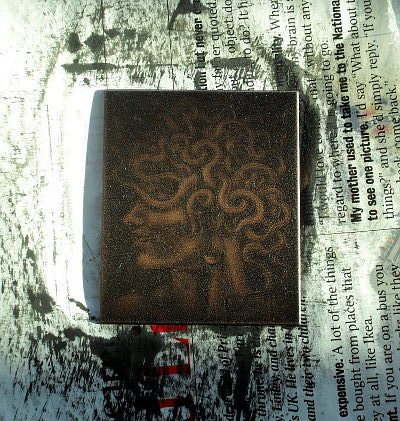
January 2012: This series of small prints are my first attempts at the art of mezzotint printmaking: a fascinating, and now slightly obscure, form of engraving. The prints are small (a mere 5x6 cm each), because the process not only allows for great detail, it is also very time-consuming. And on top of that, I am still developing a 'feel' for the process before I embark on anything larger.
Click the thumbnails below to see each image in full:


So what is a mezzotint? It's a form of intaglio printmaking, just like etching or engraving, where an image is printed from a (usually) metal plate, and the way of making the print is to cover the surface of the plate with ink, and wipe off the excess before printing. Because the plate has scratches or pits or roughened areas on its surface, ink is held in these areas and remains there during the wiping process until it it transferred to the paper during printing. So areas of the plate with scratches, pits, recesses etc., will hold ink and print dark. Smooth areas of the surface, conversely, will be wiped clean of ink and they will be the light or white areas in the final print. This is the opposite of printmaking processes such as lino printing, where a roller is rolled over the surface of the lino and is picked up by the high points in the surface only. No wiping of ink is involved and recessed areas in lino cutting are the areas which print light and high points print dark. With intaglio printmaking it's the other way around, and consequently requires a higher pressure to print and the inking-up process also takes longer as ink is first applied and then removed before printing.
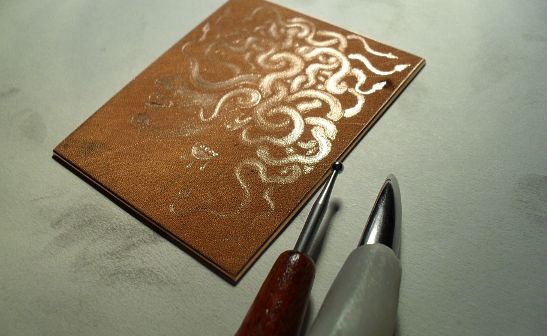
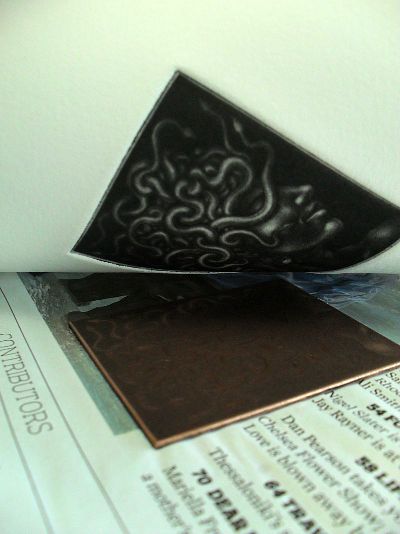
So much for intaglio printmaking in general. Very briefly, mezzotint prints are made like this: the surface of a copper plate is worked over and over with a toothed tool called a mezzotint 'rocker', until the surface of the plate is an even covering of burrs - a series of rough points and pits all over the surface of the metal. If at this point the plate were to be inked-up in the usual manner of printing from an intaglio plate, it would produce a solid black print as the roughened surface of the plate holds a lot of ink. This is the starting point. To produce the actual image areas on the surface of the plate are smoothed down again with a burnisher (usually a polished steel tool, though I have some agate burnishers as well, and something like the back of a spoon would also have an effect this way). Slightly smoothed areas will be able to hold less ink at the inking-up stage and so will print lighter. Areas burnished back to a smooth, shiny finish will hold no ink and will print white (or, in my limited experience, more usually very pale rather than crisp white: the only weak point in the technique is that the smooth areas are now slightly recessed and it is difficult to wipe these areas clean of ink without removing too much ink from the surrounding areas, but, I persevere!). A scraper can also be used to scrape off the burs. Once the image is thus scraped and burnished into the roughened surface of the plate, it is inked-up: the copper plate is covered with ink which is pushed into all the pits of the roughened surface. Then the surface of the plate is wiped clean leaving just the right amount (one hopes) of ink left in the pitted surface of the metal plate.
The plate is then put through a printing press with a piece of paper on top of it, which has been previously soaked in water and only surface-dried so that it is still soft. On top of the paper are three very specialized blankets, and a steel roller goes over the whole lot at high pressure, squeezing the paper into the ink-filled pits on the surface of the copper plate, and transferring the image onto the paper. To make a second print the plate must be inked up again and wiped.
And that is a very brief explanation of mezzotint printmaking. I did not, in fact, carry out the first part of this process - the roughening of the surface with a rocker was actually done by machine, but it's a tool I may invest in at some point, if I think my wrist can stand the repetitive action! For the moment, though, I have found that very good 'pre-rocked' mezzotint plates can be got from here.
If you would like to see more photos of my first attempts and maybe a little more detail, I have been posting progress on my blog here:
A first attempt at mezzotint
A first attempt at mezzotint: part 2
A first attempt at mezzotint: part 3
...and all my posts concerning mezzotints can be found at the link below, though in order of the newest first:
http://nancyfarmer.wordpress.com/category/artwork-in-progress/mezzotint/
One thing leads to another: I got into mezzotints by way of etching. Having some two or three years back taken up making etching prints, I drifted toward the making of mezzotints. The move to etching, however, was partly inspired by the idea that etchings would compliment my other artistic activities in that they are quicker to produce than my paintings. In fact they are not necessarily quicker, but as each one (usually) results in a limited print run of several pieces, the time spent on each individual piece is lessened, and so I can afford to sell them at a price that is, well, more easily affordable.
But I really do love detail and fine control of my medium, and the techniques I have begun employing in aluminium etching (a material prone to slightly capricious behaviour), had started to lean towards mezzotint already. Mezzotint engraving is anything but quick, but it is fascinating, and unique in its ability to work from dark to light and not the other way around, and, very nearly, employs my redundant jewellery-making skills.
All images and prints are © Nancy Farmer. Please email me if you wish to reproduce any of these images, or see my permissions page in the 'info' section.